DASH Tutorial – #2 Display DASH Stream

DASH Tutorial – #2 Display DASH Stream

This is the second part of the tutorial on how to work with DASH-Streams. For more information about how to create and encode content for DASH, look at the first part of the tutorial here.

In this part, we will look at different video players that can display DASH content. We will only focus on web-players and not applications like VLC. The video players I will discuss are the following:

  • dash.js
  • Shaka-Player

Tutorial overview

You can find a complete overview of the tutorial with all the resources and examples mentioned in the posts here: http://halcyon.ch/halcyon_dash/

dash.js

Introduction to dash.js

This is a very basic video player and doesn’t require a lot of time to set up. With this player, we simply want to test if the stream we created in the first part of the tutorial works. You can find the GitHub repository here: https://github.com/Dash-Industry-Forum/dash.js/

(more…)

DASH Tutorial – #1 Getting started with DASH

DASH Tutorial – #1 Getting started with DASH

I recently read about DASH (Dynamic Adaptive Streaming over HTTP) and an implementation of this standard in a video player from google here. If you haven’t heard of DASH before, check out this intro video (until 1:31). So I made it my goal for one day to learn as much about it as possible. I came quite far and reached the goal I set myself for this one day. It turned out, that even though it’s widely used, there is little documentation for real beginners. This is one thing that I want to change with my posts.I will now try and explain how you can get a good start into the DASH-Environment. As there is so much to talk about, I had to split my small guide/tutorial/howto into two parts:

Tutorial overview

You can find a complete overview of the tutorial with all the resources and examples mentioned in the posts here: http://halcyon.ch/halcyon_dash/

#1 – Get started with DASH [LINK]
In this part of the tutorial, we take a closer look at what DASH is and how we work with it. We then will mainly set up the DASH environment. We also take a look on how to install MP4Box and x264. We then encode our first video to the DASH-Format and make it available as a stream.

#2 – Display a DASH stream (Shaka-Player) [LINK]
In the second part, we will take a closer look on how we can access these streams. We will do this with the dart.js and the Shaka-Player.

Introduction

Summarized, the DASH standard gives the opportunity that the client can switch automatically between the representation of the video. So the client can easily switch between the codec and the language for example. This is as mentioned in the video above very important when you don’t have a stable data connection so. So the quality and the codec of the video can be dynamically changed by the client (the video player). For this to work you have to encode the content in different resolutions and bitrates.

bbb_screengrab

An example of a DASH Stream. (Frame from the Youtube-Video mentioned above)

The documentation gives the following examples for resolutions and bitrates:

  • 1920×1080, 5.0 Mbit/s
  • 1920×1080, 3.0 Mbit/s
  • 1280×720, 2.0 Mbit/s
  • 1280×720, 1.0 Mbit/s
  • 854×480, 750 kbit/s
  • 640×360, 350 kbit/s

To encode your content in these different resolutions and bitrate you can use DASHEncoder or x256 (ffmpeg). To make your content ready to stream, you then have to generate a DASH manifest and the actual segments. You could use the DASHEncoder for that as well, but I’m going to use MP4Box in this tutorial.

If you think, that you already heard of such a standard, you’re not wrong. Last year Apple announced that their approach for this problem is Apple HLS. This is already implemented in the modern web browsers like Chrome, Microsoft Edge or Safari.

The goal of this two-part tutorial will be different video players that handle our own DASH-Stream. (more…)

Compile and install GPAC/MP4Box on Mac [Updated 2017]

Compile and install GPAC/MP4Box on Mac [Updated 2017]

This is a small step-by-step guide on how to download, compile and install GPAC and especially MP4Box on a Mac environment. I suppose most of it could be done with Linux in a very similar manner. There is an official guide for this, and it helped me quite a lot, but it was missing some (for me) crucial steps. That’s why I’m summarizing my steps I did to install GPAC.

#1 Clone GitHub

You can find the GPAC repository here: https://github.com/gpac/gpac

Create a new folder locally and then clone the repo normally:

git clone https://github.com/gpac/gpac.git

#2 Installing GPAC extra libs

Now it starts to get very interesting. You need some additional libraries so that GPAC works properly. To get them they use MacPorts in the official guide for this. If you haven’t installed MacPorts yet (as me) then you need to follow the steps on the MacPorts page here. I can only recommend using the package installer because that’s way easier than the other way (with Xcode etc.). But your choice.

If you have already installed MacPorts

If you have updated your operating system since you’ve last used MacPorts, then it is very likely that you have to update MacPorts again. You will get messages like:

Error: Current platform "darwin 15" does not match expected platform "darwin 14"
Error: If you upgraded your OS, please follow the migration instructions: https://trac.macports.org/wiki/Migration
OS platform mismatch
    while executing
"mportinit ui_options global_options global_variations"
Error: /opt/local/bin/port: Failed to initialize MacPorts, OS platform mismatch

Just go to the install page and get your appropriate “macOS Package (.pkg) Installer” from there. Then install it and continue with the following steps,

When you successfully installed MacPorts you then update MacPorts itself with:

sudo port -v selfupdate

After that, you can install all the libraries needed for GPAC via MacPorts:

sudo port install pkgconfig freetype libpng jpeg spidermonkey185 libsdl ffmpeg faad2 libmad xvid libogg libvorbis libtheora a52dec openjpeg

If you get the warnings about not having installed the Xcode Command Line Tools:

Warning: The Xcode Command Line Tools don't appear to be installed; most ports will likely fail to build.
Warning: Install them by running `xcode-select --install'.

Then just do as told and run

xcode-select --install

Error: Port libsdl-devel not found

This was an error that occurred while trying to install “libsdl-devel”. This library simply isn’t available anymore. But that’s no problem, as this was the development version anyway. Just use “libsdl” instead.

For my installation, I skipped the steps Setting up UPnP (Optional) and Setting up OpenSVCDecoder (Optional).

#3 Compile/Build the code

To configure the installation use the following command:

./configure

Then you can build GPAC with the normal make command:

make

The build process should work without problems now.

#4 Install GPAC/MP4Box

Now after the build was successful, you have two options to install GPAC. You can create a DMG-file or install it directly with:

sudo make install

Even though I made this and restarted everything MP4Box wasn’t still working and I had to manually copy the files to the system. I used the following commands for that:

cd bin/gcc/
cp libgpac.dylib /usr/local/lib/
cp libgpac.dylib /usr/local/include/
cp MP4Box /usr/local/bin/

After that MP4Box should work properly:

MP4Box -version
android-square-progressbar v.1.6.0

android-square-progressbar v.1.6.0

After I got some feedback and new ideas from the GitHub repository, I implemented the following features for the 1.6.0 build. Additionally, I finally rewrote most of the logic of the SquareProgressBar drawing method. Together with a new icon and some changes to the UI, I just released the new major version 1.6.0. Get it via gradle:

dependencies {
    compile 'ch.halcyon:squareprogressbar:1.6.0'
}

indeterminate feature

Suggested on GitHub (issue #26) was an indeterminate ProgressBar that always runs around the image to visualise a progress for which we don’t know the final duration or the current progress. You still can customise the SquareProgressBar with colours, size, opacity and so on. All these settings still work with this indeterminate ProgressBar. To activate this, simply set the following flag on the SquareProgressBar :

squareProgressBar.setIndeterminate(true)

After this is set the SquareProgressBar will behave like shown in the following video:


center line featureCENTER-LINE

This is a very small addition to the style settings. It simply displays a small line in the middle of the path that the SquareProgressBar has to go. You can simply set this via the following line of code:

squareProgressBar.drawCenterline(true)

You can see an example of the center line setting on the right side.

getImageView

Another request (issue #34) was to provide a getter method for the ImageView. There are android-libraries that need the ImageView to do some async loading of the images or something else. So this is available now as well on the SquareProgressBar class:

/**
* Returns the {@link ImageView} that the progress gets drawn around.
*
* @return the main ImageView
* @since 1.6.0
*/
public ImageView getImageView(){
    return imageView;
}

small changes

There are also some smaller changes to the UI. For example, there is a new image that is considerably bigger than the others in the example application. But this isn’t shown in the application anymore because the bug where the big images make the SquareProgressBar behave strangely is finally resolved. I already fixed part of the problem back in 2014, but I recently came across the right XML-setting to remove the blank spaces around an ImageView, when the Image is wider than the screen of the phone. You can see the change here commit: 513b45b. The trick was to add the following line to the XML:

android:adjustViewBounds="true"

Future changes

One thing that I want to make much simpler in the next version is the usability of text in the SquareProgressBar. I already have a good idea on how I want to achieve that, but that has to wait until I finished some other projects.

You can find the repository on GitHub as usual: android-square-progressbar

The library is available on Bintray: squareprogressbar

driveimageview release

driveimageview release

1
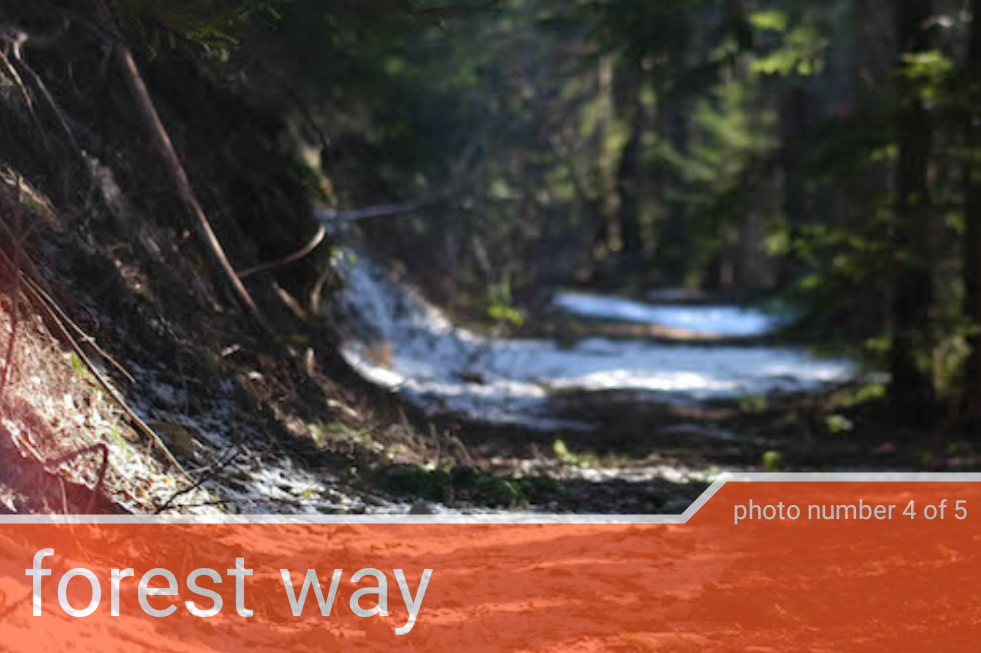
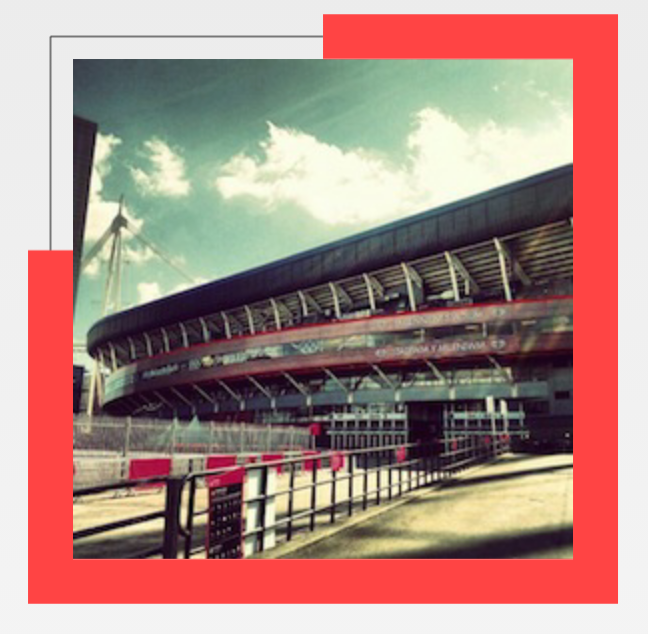
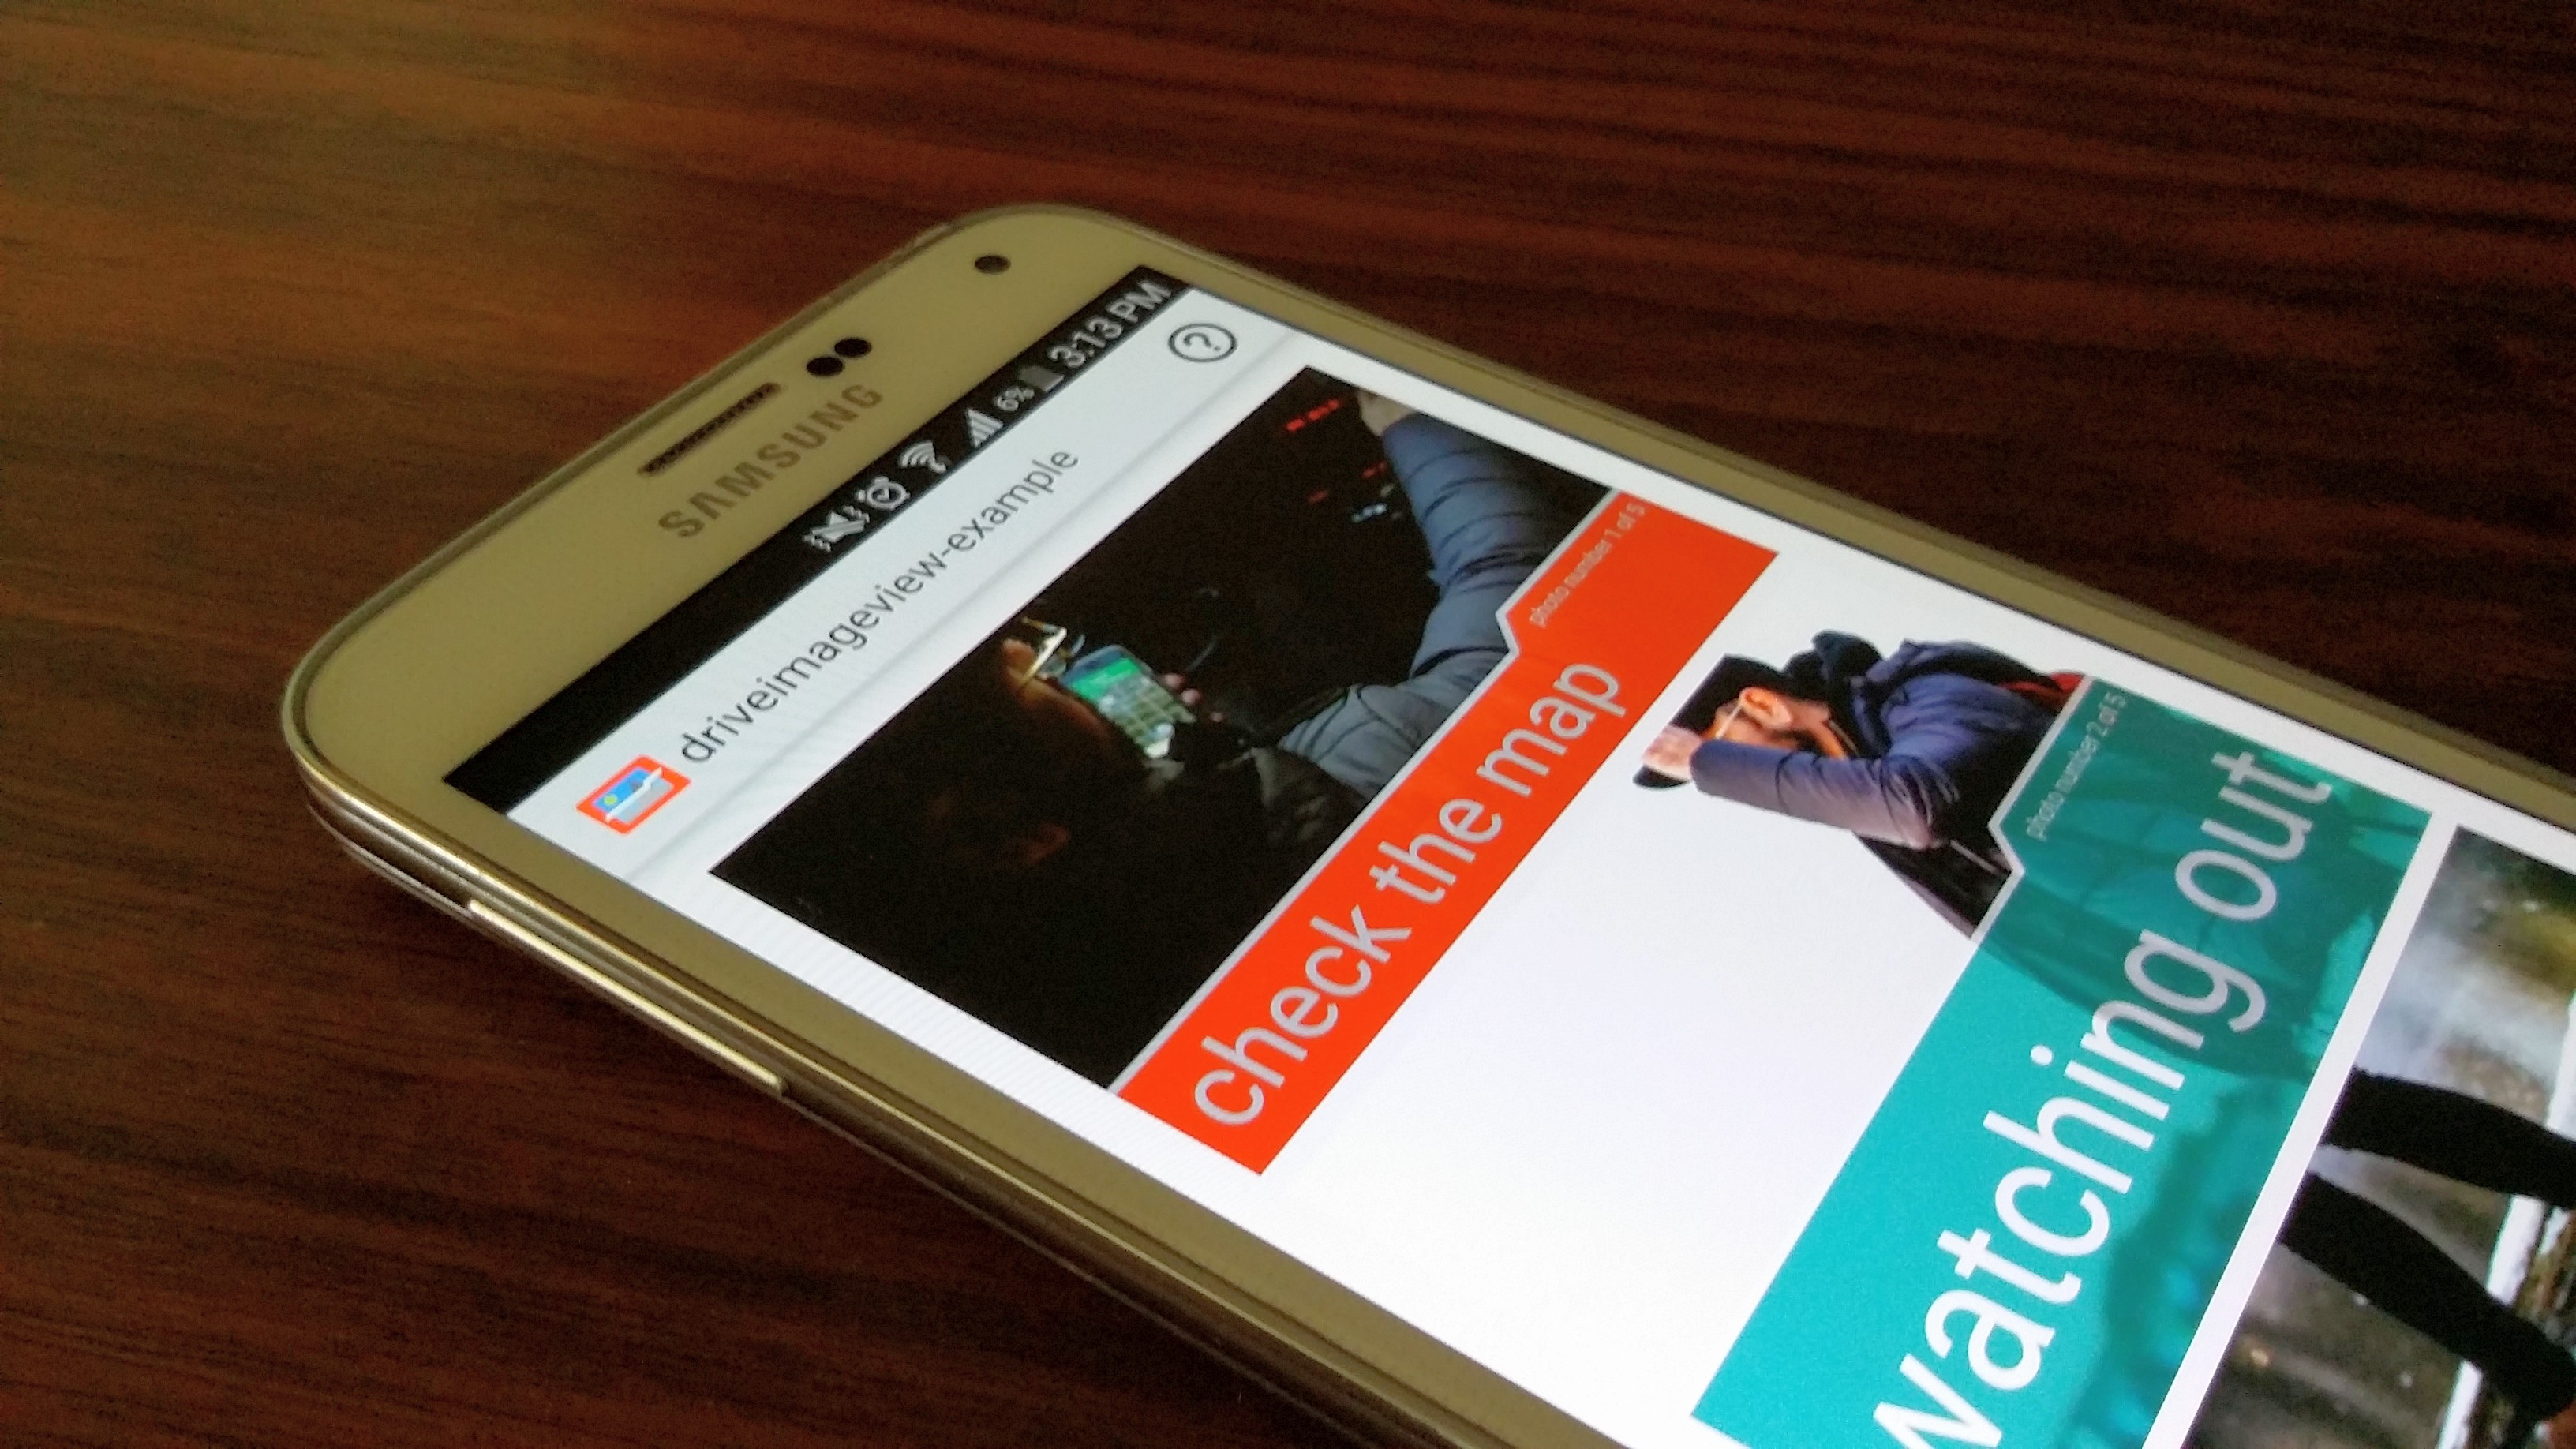
I finished a new android library today. It’s an idea that I had in my head for quite some time and finally got enough time to implement it. With the driveimageview library you can add some text or a description to an ImageView in a nice and colourful style. You can see an example of such a DriveImageView on the right side.

Build-Up

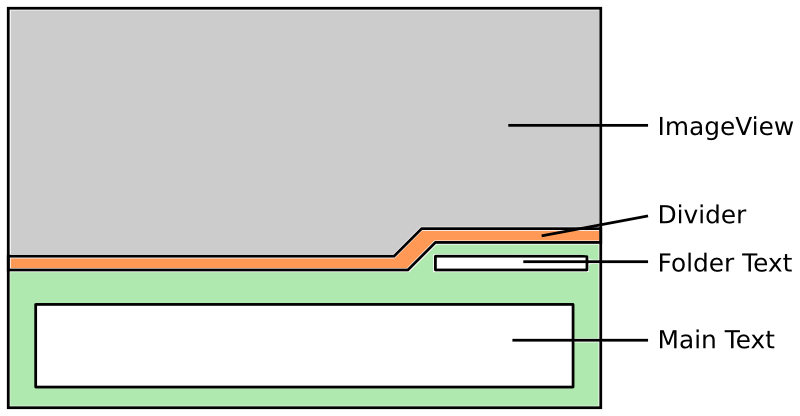
The DriveImageView is built from basic contents. At its heart, we have the normal ImageView. This is the widget where the library sets the image. Then in the layer above we have a CustomView which has the same size as the ImageView. And on that canvas the library draws the whole figures and the text. The reason why I didn’t use TextView’s to display the text is that working with the canvas itself gives the library much more options when it comes to the text-size of the texts. Also, these TextView sometimes have this strange behaviour when they should automatically resize and so working with the canvas was alright.

sketch

With the help of the canvas I could figure out a nice way which automatically resizes the Text to the custom heights of the figures. If you’re interested to find out how I did this, you can take a look at the following method in the DriveImageViewLayout.

Customisation

When I build a library it’s very important for me that its components can be easily customised with as less hassle as possible. Also, I want to keep the amount of things that can be customised as high as possible. The driveimageview-library gives the possibility to customise the colours of all figures (the divider and the main figure). You can change the height of the main figure as well as the width that separates the left border and the folder-text. But if there isn’t set a custom height it automatically calculates a nice height. The font size of the main and the folder-text changes according to the size of the height of the figures. This works pretty well and it’s programmed in a way that saves resources and time in the main draw method.
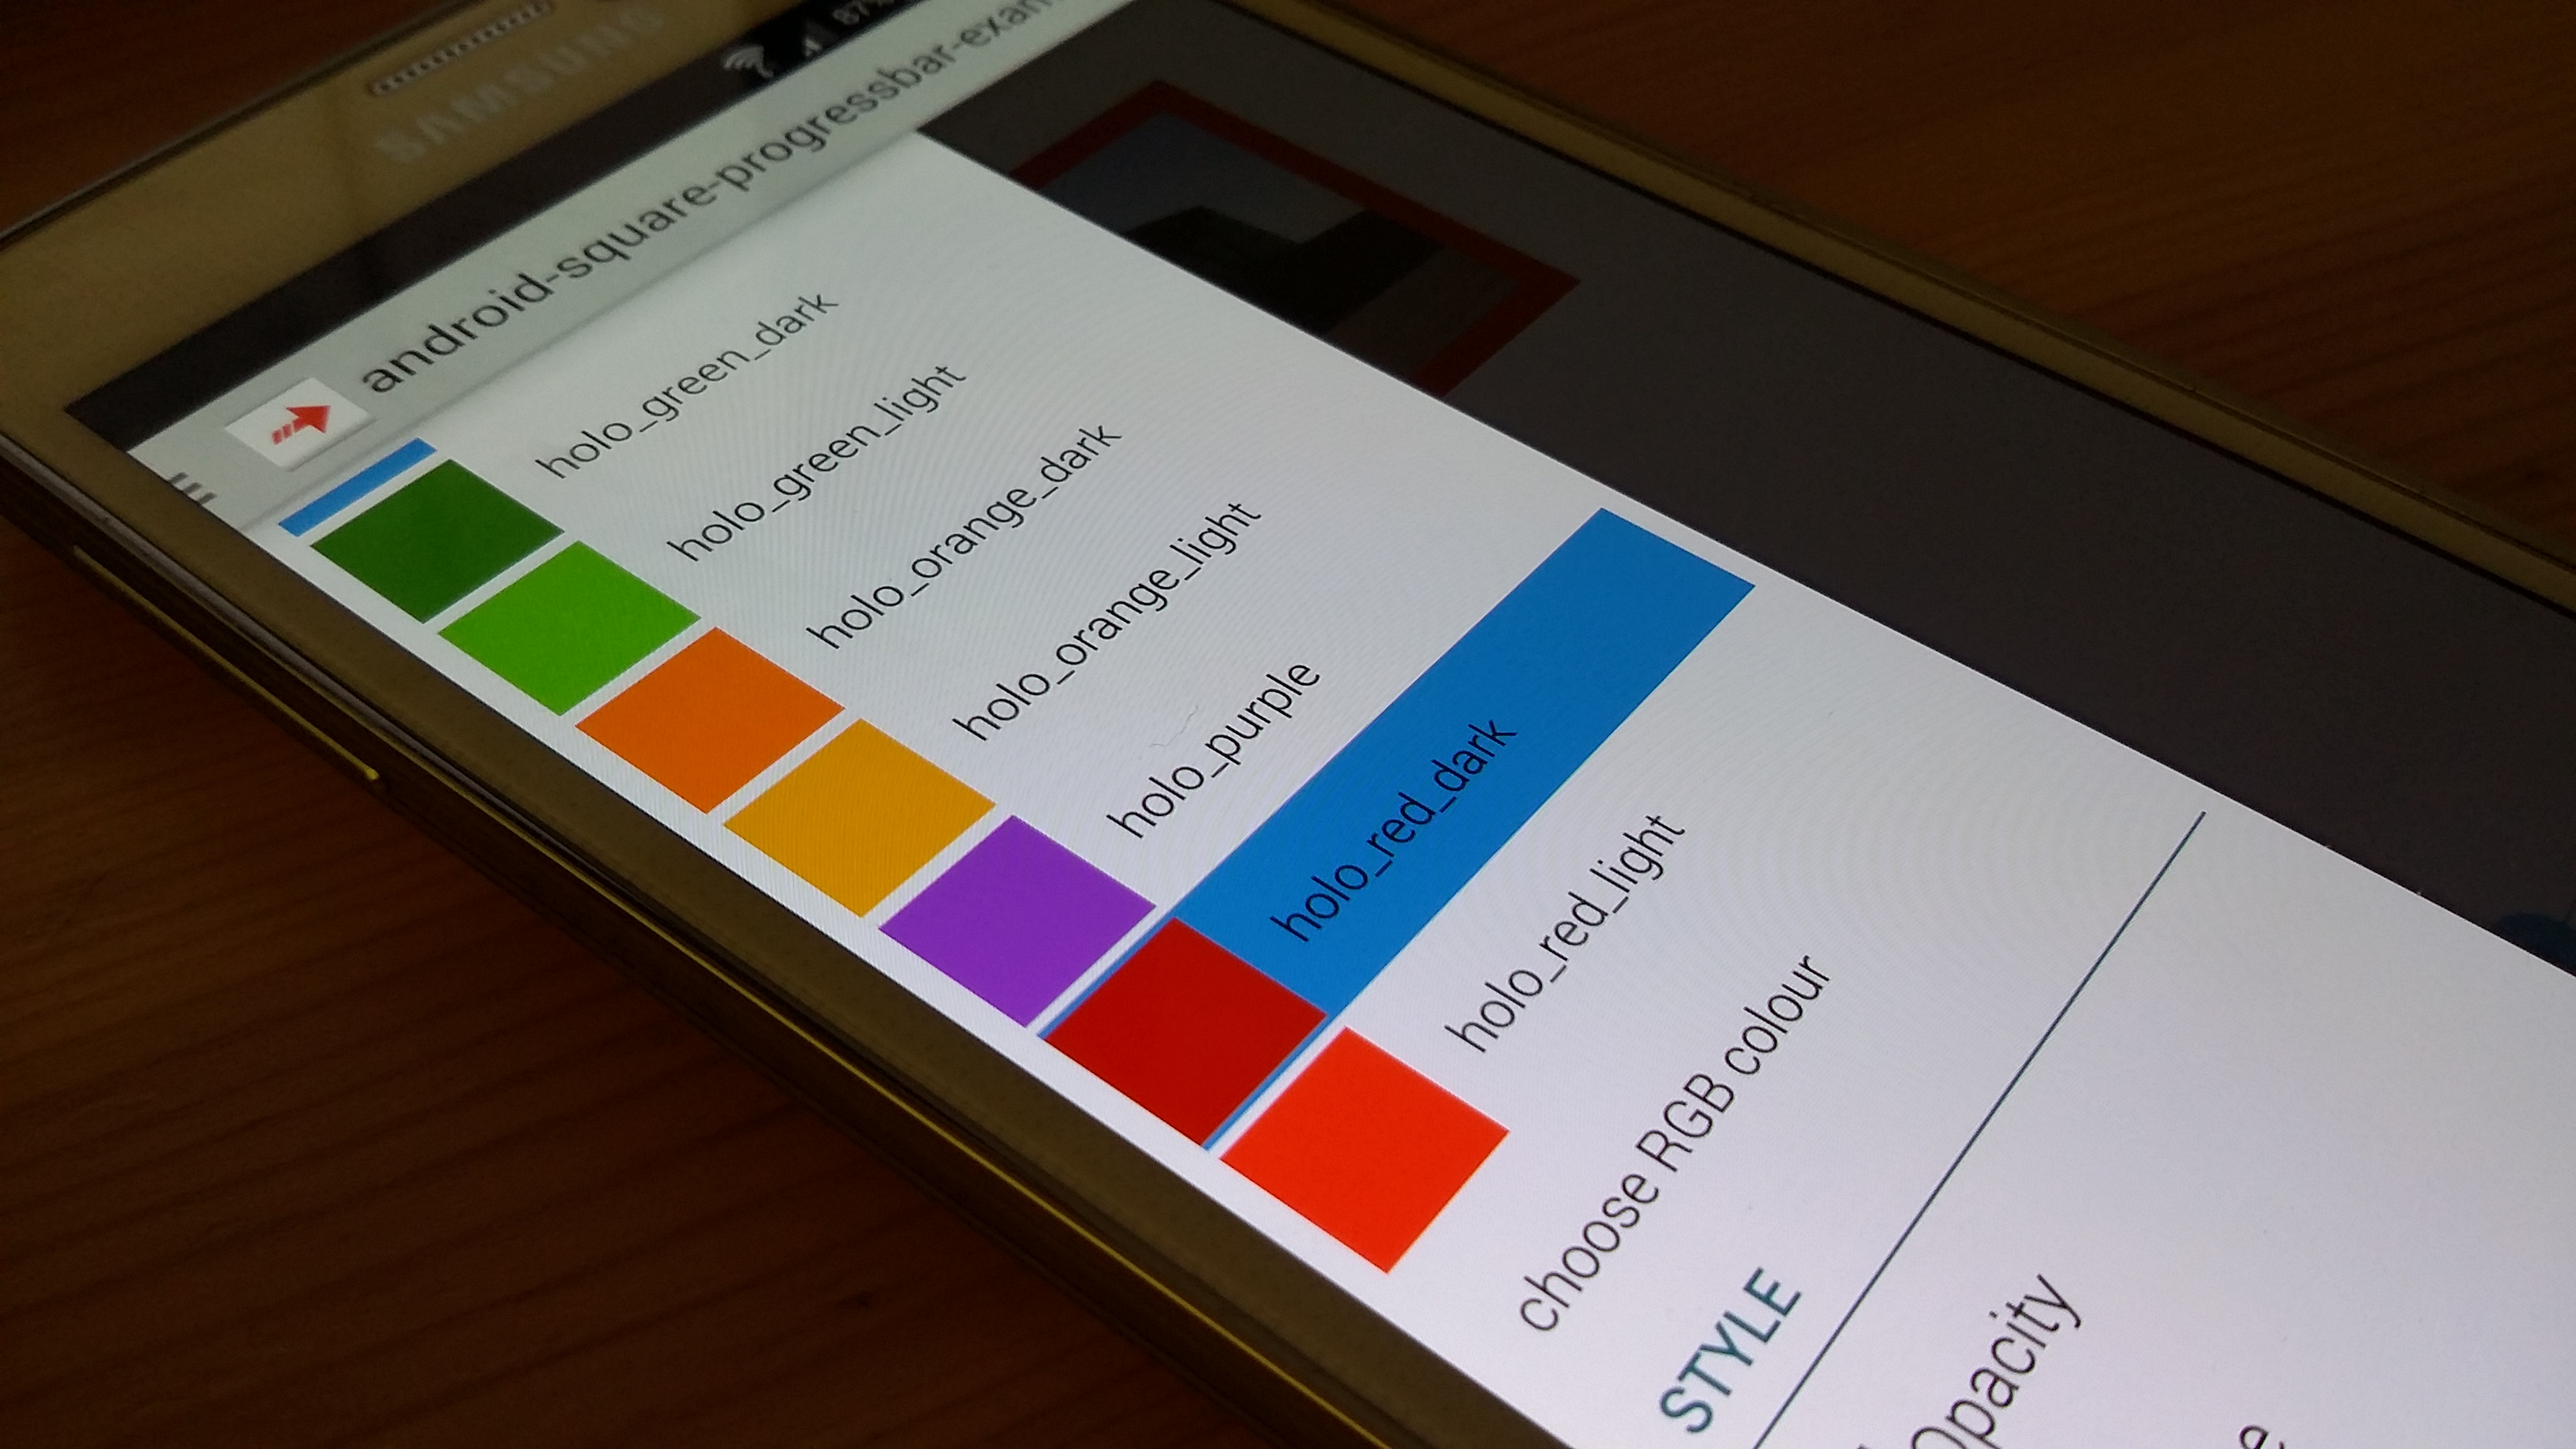
Gradle

After the android-square-progressbar library works so nicely with Bintray I decided to publish this library there as well. This gives users easy access to it. You can add it to your project via these two simple additions to your gradle-files.

Just add the following repository to your root build.gradle:

allprojects {
    repositories {
        jcenter()
        maven { url "https://jcenter.bintray.com" }
    }
}

Then in your app build.gradle:

dependencies {
    // other repos ...
    compile 'ch.halcyon:driveimageview:0.0.1'
}

How to use it

After you added the library to your gradle files (see above) you then can add the DriveImageView to your layout XML-Files. Just select it from the CustomViews-Chooser or add it directly via the XML:

<ch.haclyon.driveimageview.DriveImageView
  android:id="@+id/driveImageView"
  android:layout_width="wrap_content"
  android:layout_height="wrap_content" />

In your code, you then can introduce the object and set some basic settings:

DriveImageView driveImgView = (DriveImageView)findViewById(R.id.driveImageView);
driveImgView.setDriveImageModel(new DriveImageModel("main text", "small text", R.drawable.image));

As you can customise so many things, I did this brief overview, so you can find the right way for you to modify the DriveImageView:

setFolderCorner(float folderCorner)

This sets the height and the width of the “crack” in the divider line, where then the folder text is located. The value is in dp and later gets converted into pixels for the canvas.

setCustomFolderSpacing(float customFolderSpacing)

This sets the space from the left side of the image to the right side of the folder crack.

setCustomHeight(float customHeight)

This sets the custom height of the whole figure that is in front of the ImageView.

setImageScaleType(ImageView.ScaleType scale)

This is something that I added after it turned out to be really useful in the android-square-progressbar. You can set the ScaleType of the ImageView to maybe make the image it contains look a bit better.

setAlphaValue(float alphaValue)

This sets the opacity value of all the figures on the canvas. The value should be between 0f and 1f.

setTextColor(String textColor)

This sets the colour of the text. This includes the colours of both the main and the folder text.

setDivideColor(String divideColor)

This sets the colour of the divider-part of the figure.

setBackgroundColor(String backgroundColor)

This sets the background colour of the main figure (without the divider part).

Future

I will continuously update this library and add some more options when I’ve got enough time. If you found a bug or if you want to request a new feature for the library, then you can do this on the GitHub page here: https://github.com/mrwonderman/driveimageview/issues

GitHub repository: https://github.com/mrwonderman/driveimageview

Play Store: https://play.google.com/store/apps/details?id=ch.haclyon.driveimageview.example

android-square-progressbar with gradle

Since today, you can easily use the android-square-progressbar with a working gradle environment. So to use it in your android project just simply add the following repository to your main gradle file:

allprojects {
    repositories {
        jcenter()
        maven { url "https://jcenter.bintray.com" }
    }
}

And then add the following dependency to your application module:

compile 'ch.halcyon:squareprogressbar:1.5.1'

You can find the repository on Bintray here: https://bintray.com/mrwonderman/maven/squareprogressbar


android-square-progressbar v.1.5.0

android-square-progressbar v.1.5.0

UPDATE: version 1.5.1

Due to a small bug in the version 1.5.0, I had to fix and rebuild the library. So the newest version is 1.5.1.

This is the newest major release of my android library. After various comments and some preparations, I finally switched the library to gradle. I also switched the structure of it accordingly to the guidelines of the Android Studio. But the most important change is the new package name.

android-square-progressbar-legacy

I always planned to have a second repository for the library when I change to gradle. That second repository should be for the people who still use the Eclipse environment. So they can easily use the library without hassling with gradle. You can find the repository here: android-square-progressbar-legacy

new package name

In the recent weeks, I was slowly migrating content from my old website (signer.pro) to halcyon.ch. I want to use this domain for my projects from now on and so I had to migrate the library as well. The other reason for the change is that as I want to push the library to the central maven repository I have to match the package name with a domain that belongs to me. But when I started developing (5 years ago) I didn’t have an own website so I then set the package name to net.yscs.android. It now turns out, that yscs.net is a Chinese company, so I can’t buy that domain. Thus, I had to change the package name anyway to publish to the central repo.

If you update to the newest version of the library you have to change the paths of the imports and the layouts accordingly (sorry!!). The old layout was:

    <net.yscs.android.square_progressbar.SquareProgressBar
        android:id="@+id/progressbar"
        android:layout_width="wrap_content"
        android:layout_height="wrap_content"
        android:layout_alignParentTop="true"
        android:layout_centerHorizontal="true">
    </net.yscs.android.square_progressbar.SquareProgressBar>

But with the updated version 1.5.0 you now have to use it the following way:

    <ch.halcyon.squareprogressbar.SquareProgressBar
        android:id="@+id/progressbar"
        android:layout_width="wrap_content"
        android:layout_height="wrap_content"
        android:layout_alignParentTop="true"
        android:layout_centerHorizontal="true">
    </ch.halcyon.squareprogressbar.SquareProgressBar>

future stuff

The biggest thing that will come in the coming month is the deployment of 1.5.0 to the maven central repository. After that is done, I will add the code of the indeterminate progressbar (see issues/26). This will be the first real deployment of a new feature with gradle and I’m kinda looking forward to that. That’s it for the moment. I will post again, as soon as the library is available at the central repository.

android-square-progressbar: https://github.com/mrwonderman/android-square-progressbar

BBC Radio 1 – Now Playing

BBC Radio 1 – Now Playing

During the recent weeks, I had some time to take another look at the Android Studio. I have to admit that it took my a long time to finally switch from the eclipse environment to the Android Studio. But now that I’ve done it, I don’t really want to go back. But the main reason to develop this app was that I’m an avid listener of BBC Radio 1. It’s the only radio station I really listen to while I’m working for school and so I come across many songs I really like. The problem is, that most of the time, I can’t find the tab in the browser in time to find how the son is called. (This may sound strange but when my desk is full of school stuff its already hard to find the mouse…) So I wanted to make a small app, which shows me the current song and its artist. I also wanted to make it as simple as possible. It should be my first app made in the Android Studio as well.

Getting the data

I started with finding the right data source. I played around with the BBC Radio 1 Web Player and found some pages that provide the current artist and song as JSON-data. So after that I started a new project in the Android Studio. I knew that I would have to do some async/sync calls to get the data, so I immediately added these two dependencies:

After that, I started with transforming the data into java objects. This worked really good and so I then worked on the layout of the app.

Layout

layoutThe most important thing in the layout for me was the cover of the CD. In my opinion, it’s just the easiest way to remember the song. I wanted to display the current show too because sometimes I just want to know if there will be some special guests coming to the show. This information is usually in the description of the current event (on the Web Player), so it didn’t take me long to find it in the JSON-data.

But I came across a problem to display the album cover in a stock ImageView. But I knew that there was a nice library which would make this much more easier. This library is called ION (GitHub). And it’s really easy to use as well. The following snippet shows, how I just have to give it the ImageView-object and the URL to the image:

Ion.with(imageView)
       .placeholder(R.drawable.ic_launcher)
       .error(R.drawable.ic_launcher)
       .load(dataService.getNowPlayingImageUrl(realtime.getRecord_id()));

I have to admit, that I was lazy and didn’t create some more interesting placeholders.. But that’s a task for another day. The rest of the layout consists of just normal TextViews and a LinerLayout which is filled with a black background and acts like a divider between the two pieces of information.

Widget

2015-03-15 13.09.12After I finished with the main application I used it for a few days and I was quite happy with it. But I then started to check the application more regularly and I thought that I could do a widget too. This would make checking the current artist far easier and I haven’t developed a widget before. So I started to work on that new challenge. The page that helped me the most with the development was the official android sdk guide. You can find that here: android-sdk-widgets

The one problem I had was that normally widgets only reload their data every half an hour. And this isn’t really what I was looking for, as the data changes approx. every 4 – 5 minutes. So I googled around and came across the best solution for this problem: Alarm Managers. I worked with that and created the class AppWidgetAlarm. You can check this out in the repository to see how it works in detail.

Future

I won’t upload the app to the Play Store, mainly because the source of the data isn’t from me. But I published the code to GitHub, to help others when they work with one of the mentioned libraries or when they want to see how I did the widget. Maybe there are people, who just want to build the application to enjoy the benefits of always knowing which song is on.

I will continue to enhance the app though. I hope that the Google Now Card API is getting public soon. It would be nice to integrate it there as well. I sometimes get an error when the app runs too, so there is some bug-fixing to do. I think there is something wrong with the parsing, but it is working in like 99% of all cases so it’s hard to debug. Another thing I might want to add its the actual radio stream. But this isn’t something that easy I think, but maybe another challenge for a rainy weekend, who knows. Let me know what you think of it.

Link to the repository on GitHub: https://github.com/mrwonderman/BBCRadio1-NowPlaying

android-square-progressbar v.1.4.1

android-square-progressbar v.1.4.1

I just found time to add a very interesting feature to the android-square-progressbar library. You now can set a in-code generated bitmap as the image. This also opens the door to display Text, where the progressbar goes around. This can’t replace a normal TextView, but its a start.

Extended Example

An example of such a usage would be the following. Maybe you want to display a dynamic text like a countdown or something like that. You can do this with a bitmap, that you can redraw (but if you have loads and loads of redraws, don’t do this!). I have added the following example to the wiki but I will repeat it here with a bit more text.

First of all, you create a new Bitmap in your code. I’ve set the height and the width of it to 250 and added this ARGB_8888 configuration, which makes it opaque.

Bitmap bmp = Bitmap.createBitmap(250, 250, Bitmap.Config.ARGB_8888);

I’m then creating a new canvas for the Bitmap. After that I’m configuring the paint for the text I want to write.

Canvas canvas = new Canvas(bmp);
Paint paint = new Paint();
paint.setTextSize(60);
paint.setTextAlign(Paint.Align.CENTER);
paint.setColor(Color.parseColor("#D11111"));
canvas.drawText("Crimbo!",125,155, paint);

On the last line, I’m actually writing the text onto the canvas. Afterwards my drawing is finished and I now can use the new method to set the Bitmap to the ImageView.

squareProgressBar.setImageBitmap(bmp);

If you then add the rest of the normal code that the library needs (see the wiki) the result is the following:

crimbo

You can find the GitHub Repository here: https://github.com/mrwonderman/android-square-progressbar

android-square-progressbar v.1.4.0

android-square-progressbar v.1.4.0

Finally a new major version of the square-progressbar library is out today. This includes some new style options that I implemented from the feedback I got from you. Also there are some UI improvements for the example-application and some changes in the GitHub repository. You can find the updated app in the play store.

GitHub

I cleaned up the whole repository (not as usual just code and images). So I wrote some pages in the wiki which include some examples and a usage-guide with all the available style-options. For each release there will be now a much more detailed changelog and there is a page about how you can contribute to the library as well here. Just take a look around: https://github.com/mrwonderman/android-square-progressbar

Changes

I try to show you the newest features and changes of the library and the example-application now.

Library

Thanks to a pull-request it’s now possible to set the ScaleType of the image. This is very important if you’re working with bigger images which don’t get displayed correctly. You can use the following line of code to set the ScaleType:

squareProgressBar.setImageScaleType(ScaleType.CENTER);

Another thing is the possibility to let the progressbar disappear when the progress hits 100%. By default this is switched off, but you can turn this on like shown here:

squareProgressBar.setClearOnHundred(true);

I extended the PercentStyle object with two new attributes. One lets you define another text that gets used instead of the default “%”-sign. The other one lets you set a different textcolor to the progresstext.

 squareProgressBar.showProgress(true);
 PercentStyle percentStyle = new PercentStyle(Align.CENTER, 280, true);
 percentStyle.setCustomText("#");
 percentStyle.setTextColor(Color.parseColor("#22A362"));
 squareProgressBar.setPercentStyle(percentStyle);

example_percentstyle

Example-application

I enhanced the user-interface a bit and added a RGB chooser. With this dialog you can set the color of the progressbar to a custom color. You can find this new dialog in the navigation drawer right above the “Style” title.

example_grayscale
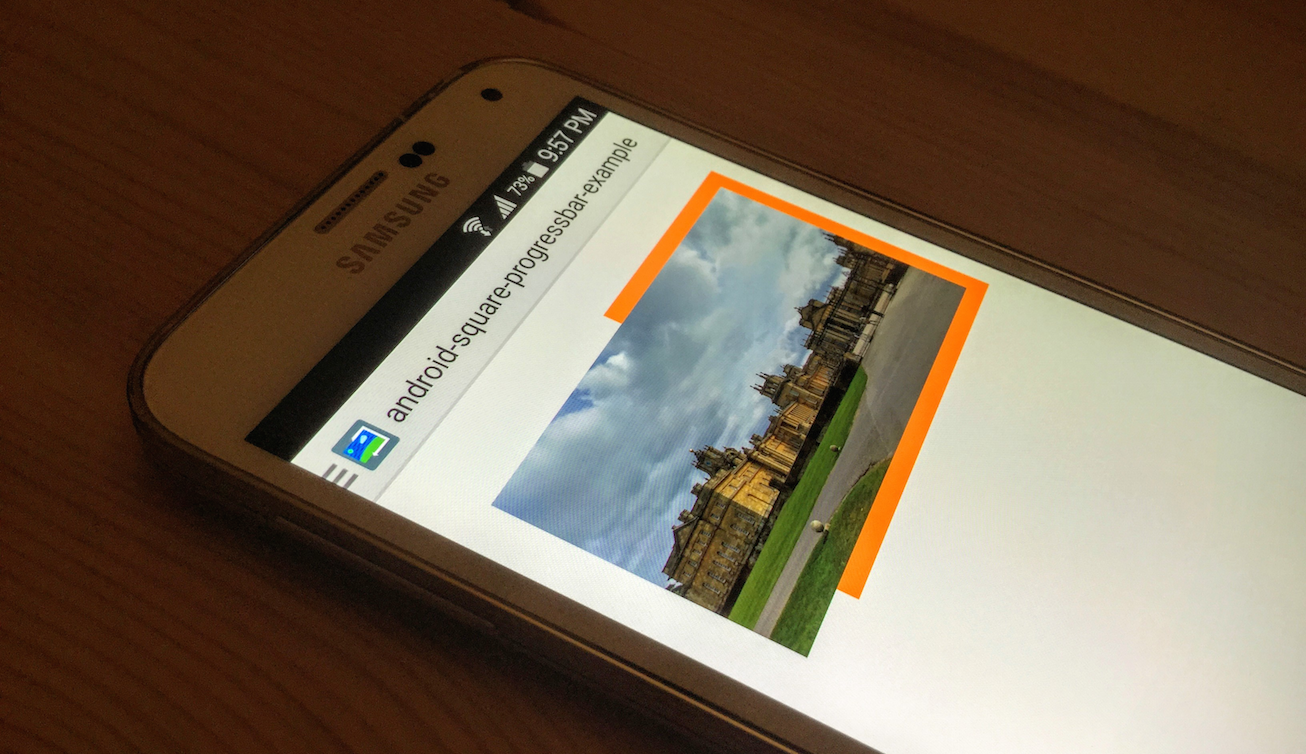
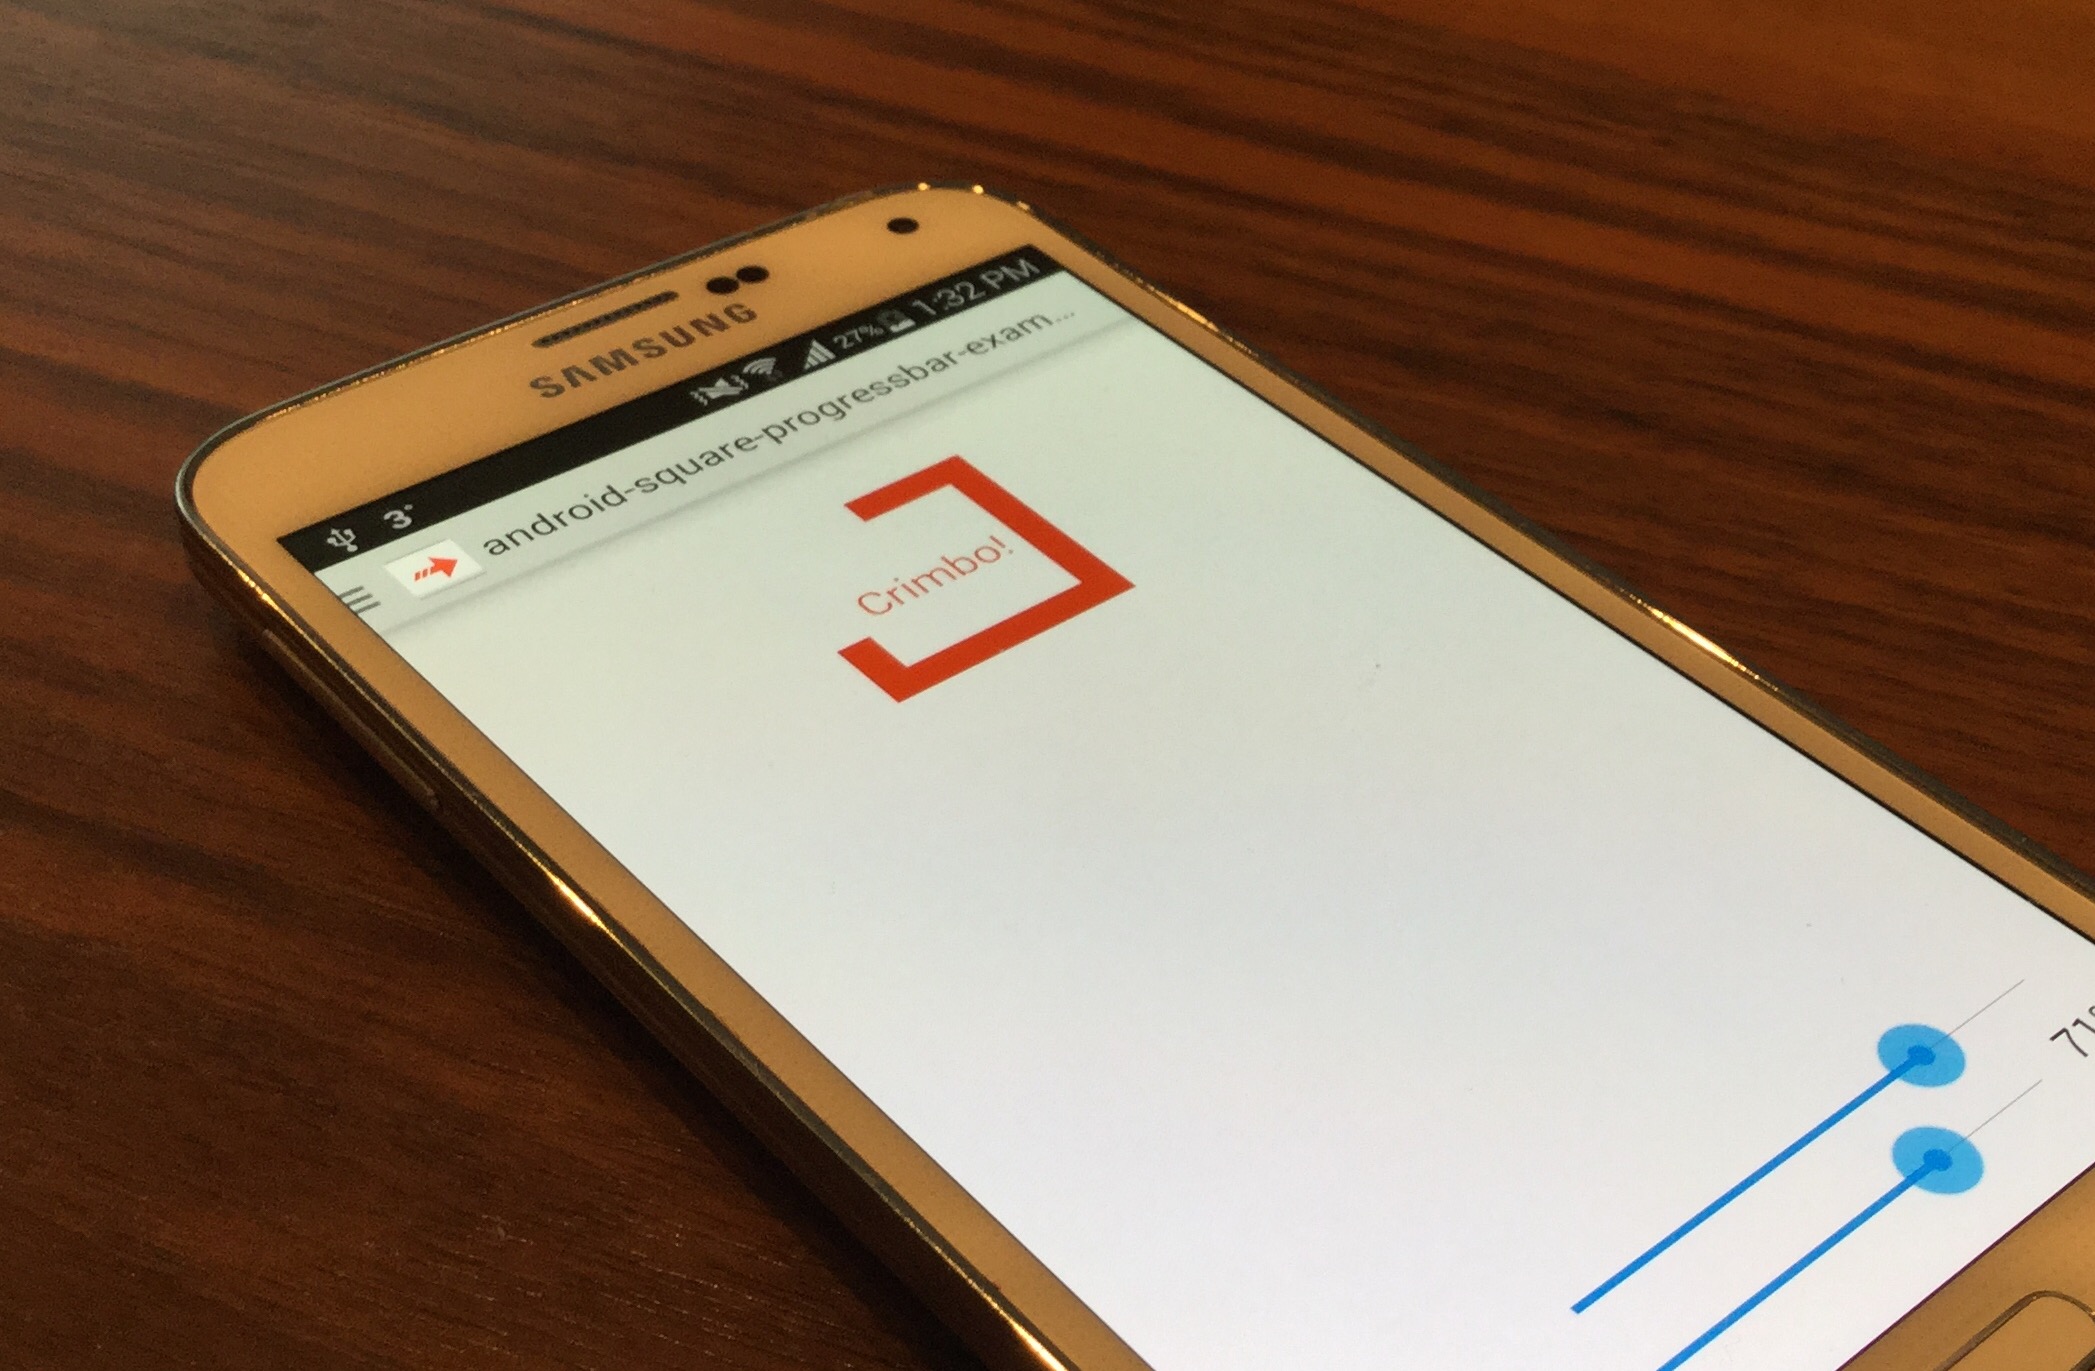
Two new style options made it into the app too. One is the grayscale option, which displays the image in different grays. The second one is the “clear at 100%”, which removes the progressbar when the progress hits 100%.

Last but not least, there is a new image that you can choose.